Overview:
The Chilkoot Trail is a 53km long hiking trail that runs from Skagway, Alaska to Bennett Lake, British Columbia, crossing the Canadian/American border at the peak of the Chilkoot Pass. In general, the trail is not overly difficult for an experienced hiker. I would go so far as to say that the first two days and last two days are easy to moderate hiking. Day 3, however, is challenging due to the large elevation gain, the climb up the boulders, the subsequent descent, and the length of the track that day. That said, when my friend and I did the trail, there was a diverse group of hikers hiking with us. Among them was a 75-year- old man (who had done the trail 6 times previously), and a family with 5 and 8-year-old girls (that had their gear and pack system down pat). The hike is very doable if you are well prepared.
Weather:
 The weather on the Chilkoot Trail can be variable. We hiked from August 12th to 16th and it was rather chilly (around 12°C – 15°C most days, and going as low as between 0 and 5 °C). There were some sunny moments though when the temperature felt closer to 20°C. The day we went over the pass it rained for most of the day, and the temperatures that day dropped to about 0-5°C on the ascent at the summit making the climb up the boulders cold. (Bring gloves! – neoprene is best for the rocks!) Apparently, the previous week, the temperatures were extremely hot and some folks were having issues on the ascent to the pass due to the heat and not having packed enough water. That said, from what I have heard rain is a common occurrence so be prepared! I would say pack like for the mountains, and assume that the later in August the more fall-like it will be.
Reservations:
Permits are required in order to overnight on the trail. Note that only 42 reservations to enter over the Chilkoot Pass are accepted each day (50 people are allowed to go over the pass each day). In order to make sure you can hike the trail on the days that are most convenient for you, and stay at the sites you want, it is best to reserve early. My friend booked in March and we had a choice of two start dates in August that worked for us. The reservations for the 2018 season start on January 17, 2018. When you call to make a reservation, you will need to let them know which camp sites you have chosen to stay at along the way. A list of campsites is available on the Parks Canada website. A good description of the sites and a map of their locations is available on the National Park Service website. To make a reservation for the Chilkoot Trail, one must call the Chilkoot Trail Reservation line at 1-800-661-0486 (from Canada and US). For additional information about reservations, visit the Parks Canada permits and reservations website.
Getting there:
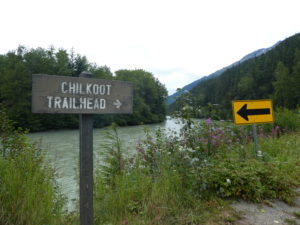
 There are different ways you can get to the trailhead (located at the site of the former town of Dyea). It is only a few kilometers away from Skagway, so getting into Skagway the night before we started the trail worked very well for us. As the first day of the hike is short and not overly difficult, if you start hiking around 11am or 12pm, you have plenty of time. This gives you time in the morning for a nice breakfast and to pick up your permits before catching the shuttle to the trail head. We decided to drive to Skagway from Calgary, AB. It was a very pleasant drive along the Alaska Highway and took about 3 days (of driving about 6-10 hours a day and camping along the way). Conversely, some hikers choose to fly into Whitehorse and then rent a car and drive to Skagway.
  If you choose to drive, make sure you bring cash with you as the provincial campgrounds along the way in BC only take cash (as do many of the bakeries and coffee shops in the small towns) and bank machines are scarce. If you choose to fly, I have heard great reviews about Air North (if it flies from a location where you are and on a day that works for you). Keep in mind that if you fly you will have to purchase your fuel for your stove in Whitehorse.
Once in Skagway, you have a choice of driving yourself to the trailhead at Dyea, or leaving your car in Skagway (at the train station) and getting Ann (Dyea – Chilkoot Trail Transport) to drive you to the trail head. That is the option we went with, as we figured it will be nice to get off the trail in Skagway after completing the trail, and not have to worry about picking up the car. Other folks chose to drive themselves to the trail head and then get the shuttle from the train station back to the trail head to pick up the car. I think that having your car right there when you arrive on the train is more convenient.
Border Crossing:
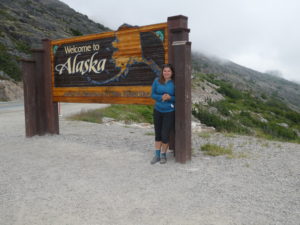 If you are arriving on the Alaska Highway (or driving in from Whitehorse) you have to cross the border into the US shortly before Skagway. This is probably the friendliest border crossing ever, where the border guard just asked a few questions about bringing in fruits and weapons, and wished us luck on the hike. (But you do need your passport so don’t forget that!)
Heading back over across the border to Canada after completing the trail, we got held up for only for a few minutes as the border guards checked our names against the train manifest and ensured our names were taken off the hiker list. Other than that, short and sweet border crossing.
Where to stay in Skagway:
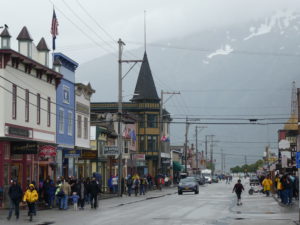 My friend and I opted to stay in Skagway the night before the hike. Some people who flew into Whitehorse drove in the morning of the hike (it’s about a 3 hour drive from Whitehorse). However, it was nice to be there already and to not have to drive for 3 hours before hitting the trail. We stayed at Mountain View RV Park in Skagway. It was basic, but offered both RV and tent sites (we had a tent). It had running water and 2 showers (though one of them didn’t work), was walking distance from the Trail Center and train station, and cost about 30USD for the night for a site. It was clean and the staff was friendly and helpful. It was good place to stay, especially if you’re trying to save money (as the hotels are a lot pricier). There are two other RV parks in town, but I can’t speak to their tent sites. You can also find a campground at Dyea near the trailhead (Dyea campground). Camping there allows you to be closer to the trail head, but there is no running water. Additionally, staying in the town of Skagway meant we could walk around town in the evening/morning.
After completing the trail, we opted to splurge a bit and stay at a hotel. We stayed at Westmark Inn, which was very nice and clean with a historical feel, centrally located near the train station. It provided comfy beds, and allowed for a pleasant evening and good night rest after 5 days on the trail. The rain and the chilly temperatures made us particularly happy to have booked a hotel for the night when we got off the trail. We were able to get a fairly descent price for the hotel through Hotwire.com.
The Hike:
Day 1 :
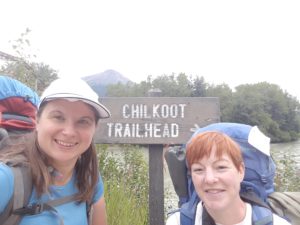 Getting Started: After coffee and a wonderful breakfast at Glacial Smoothies and Espresso, we headed over to Chilkoot Trail Center, located at 520 Broadway (between 5th and 6th Ave) to pick up our permits and receive our orientation. Note that the Chilkoot Trail Center does not appear on Google maps, but the address is written on the registration confirmation you received in your email. The town is small enough so it was quite easy to find. The hiker orientation included instructions on dealing with bears, reminders to put food in bear bins and to not forget personal items such as passports, toilet paper, hat, etc). We also found out about getting to Dyea (the location of the trailhead). It turns out that Ann M, owner of Dyea-Chilkoot Trail Transport, not only gets you to the trail head quickly and efficiently, but also provides you with some history along the way. She was great – we called her at about 10 am and asked for a pickup at 11 am, which she was easily able to accommodate.
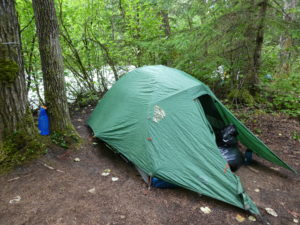
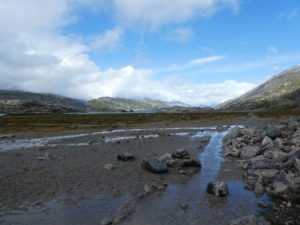
 We started our hike around 11:30 am, shortly after getting to the trail head. The hike to our first camp, Canyon City, was only about 5 hours long (with picture breaks along the way), despite the 12.5km distance from the trailhead. This is where most people stay their first night on the trail. There is one camp closer to the start called Finnegan’s Point (at about 8km) however, going to Canyon City means less to hike the next day and spaces out the distances a little better. We arrived with plenty of time to have supper at a reasonable hour, relax, and get a good night sleep.
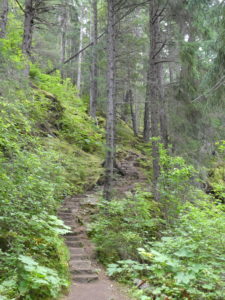
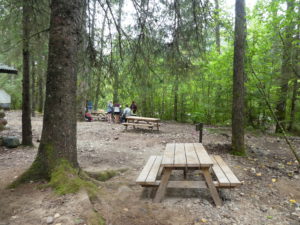
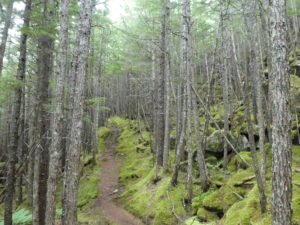
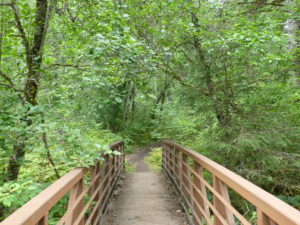 The trail to Canyon City was well maintained with lots of new boardwalk and was a relatively flat, easy, and pleasant forest walk. Canyon City was equipped with picnic tables and a warming/cooking hut with a communal wooden stove. Unlike most other camp sites on the Chilkoot Trail, Canyon City does not have wooden platforms for tents, so if it rains, it means your tent gets muddy. (That said we were surprised that at the fact that wooden platforms are a thing here at all.) Like all other sites, it does have metal bear bins for food storage. As it was fairly warm the first night (and the hut was somewhat crowded), we cooked and ate supper outside at the picnic tables. Some of the people who camped at Canyon City were only doing a one-night hike and did not continue with the trail, making the later sites less crowded. Most of the hikers with whom we went over the pass on Day 3 also stayed at Canyon City their first night.

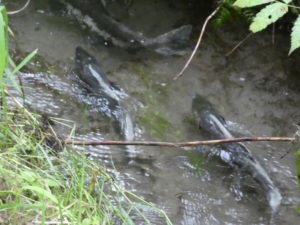
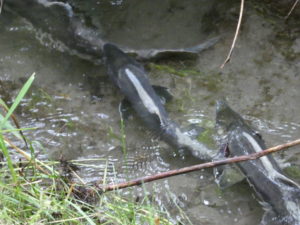
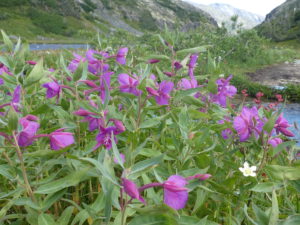
Probably the coolest thing we witnessed on Day 1 (and one of the neatest thing of the trail) was the salmon run. It was incredible watching them fight the current and swim against it in order to find a mate and spawn on gravel beds.
Day 2:
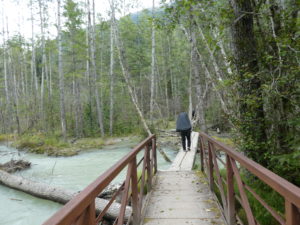
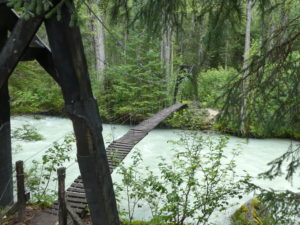
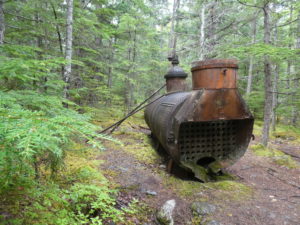
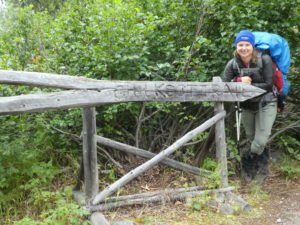
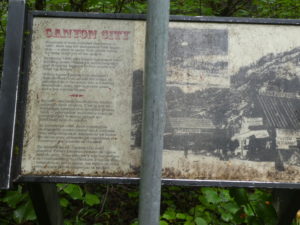 The second day was once again a fairly easy and pleasant walk. Before setting off, we decided to take a little detour across a rickety old bridge and check out the ruins of the old Canyon City town site.
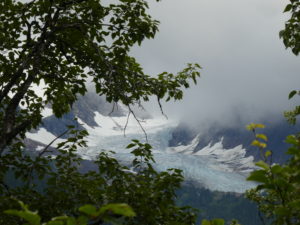
We left our packs at the camp in the bear bins so as to not carry the weight for longer than required. It took about 45 mins to walk the little loop path. From where we walked we also had a beautiful view of a glacier.

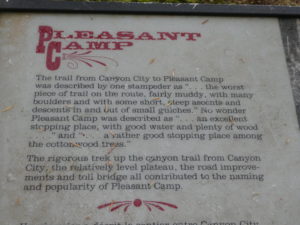 After our little morning stroll, we went back to the camp to pick up our packs and have a snack. By the time we left the campsite for good it was probably around noon. The hike from Canyon City to Sheep Camp (our next stop) was about 8.5 km, with about a 250 m elevation gain. We did pass Pleasant Camp along the way (it lies in between Canyon City and Sheep Camp). We did not stop there as it made more sense to continue on to Sheep Camp (only 3.5 km past Pleasant Camp), especially if you are doing the trail in 5 days. The total walk time from Canyon City to Sheep Camp was about 4 hours (not including our morning walk). The only downside to day 2 was the rain. By the time we arrived at Sheep Camp, the sky had completely opened up. It was pouring buckets, and it was under these conditions that we had to set up our tent. And it is these conditions that are the reason for my lack of pictures of Sheep Camp.
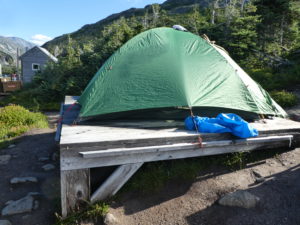
 Thankfully, there were several small warming/cooking huts with wood stoves as well as one large shelter (with no stoves) that provided refuge from the rain and allowed for a dry space to cook our supper. Also, there were elevated wooden tent pads, which meant the bottom of the tent did not get as wet and muddy as it would have, had it been set up directly on the ground. Around 7:30pm the ranger gathered everyone in the big shelter for the safety briefing, telling us what to expect on day 3. As it was cold and still raining after the briefing, we headed back to our tent and the warmth of our sleeping bags, where we both read for a bit before going to sleep. (Recommendation: bring a Kobo or Kindle with you – they are light, batteries last for many days, and it gives you something to do in the evenings).
Day 3 – “Crossing the Pass”
 We woke up on the third day to find the rain still coming down, though not as hard as the night before. The ranger had recommended a 6:30 am departure that day to make it over the pass and down to Happy Camp at a reasonable hour. (Another group of hikers told us that on a previous hike, they had left Sheep Camp at 10 am and by the time they reached the summit of the pass the rangers wouldn’t let them keep going because it was too late in the day – so they had to spend the night in the tiny shelter on the summit).
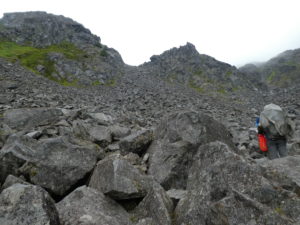
 As my friend and I are not morning people (and this is an understatement), we decided to get up around 6:30 am and leave at 7:30 am. Despite our best efforts, the clock read 8:40 am by the time we rolled out of camp. However, we were able to catch up to several hikers by the time we got to the boulders, which where the real ascent started.
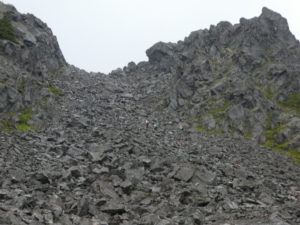
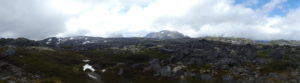
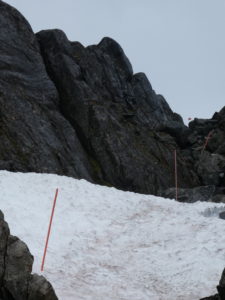
The climb up to the summit was just that – a climb rather than a hike. Fortunately, it wasn’t overly foggy so we were able to see the orange markers that are meant to guide you up the pass. I have it on good authority however, that there are days when the fog sets in so heavily that it’s difficult to distinguish the orange markers from the rocks. Even with the markers visible, the path to the summit is tricky as you have to negotiate your way around the boulders (which is not necessarily straight up and involves a bit of zigzagging). One must remember to occasionally look up at the markers so as not wander too far off track.
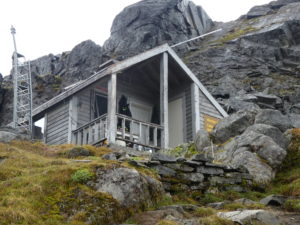 The constant search for the best route and the orange markers took up so much concentration that it did not occur to me to check the time, or that I really need to use the bathroom, until we reached the summit. When I finally did check the time it was 1:30 pm. After 5 hours of walking and climbing we had finally reached the warming hut on the summit. This is on par for most hikers (it usually takes between 4 and 6 hours to reach the summit from Sheep Camp).
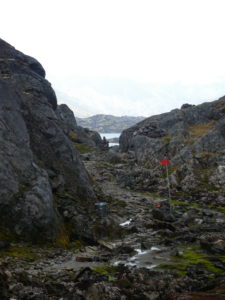 You can tell you are almost at the hut when the orange markers disappear, and in their place you see wooden poles with red flags, an indication that you have crossed the border into Canada. Upon reaching the summit, we took about 30 minutes to warm our very cold fingers, have some lunch, and take a few photos. This is where I will once again stress my recommendation of neoprene gloves. We both had light gloves, but with the rainy snow coming down on us as we climbed up and grasped the boulders on the ascent, they soon were soaked through and stopped providing the required protection for our very cold hands. In fact, our fingers hurt for the next few days and it took a while to get feeling back in a couple of them (suspect frostbite). Lesson learned: Next time I hike this trail, I will definitely bring neoprene gloves as well as another pair of gloves to put on afterwards.
 The summit marks the US/Canadian border. Nobody checks your passport here, (they do later the train), but the ranger counts everyone to ensure that all those that stayed at Sheep Camp the previous night made it over the pass and reports down to the Canadian side (park warden at Happy Camp) with the number of hikers they should be expecting. I actually found this kind of cool – it means that if you don’t make it to the summit you’ll be missed and someone will go looking for you.
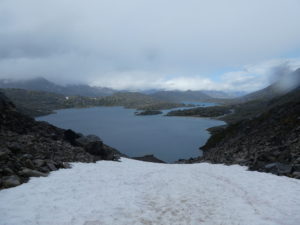
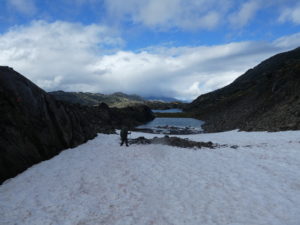
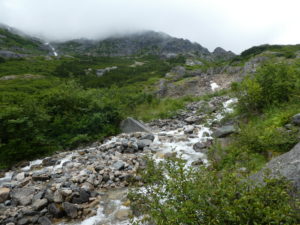
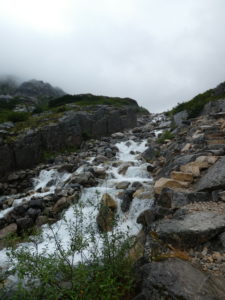
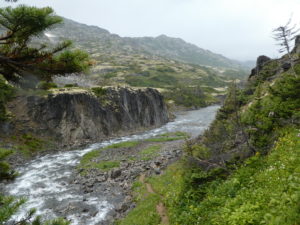
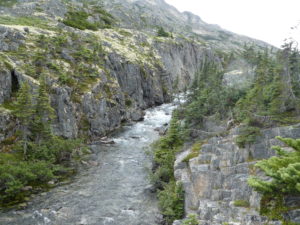
 From the summit, the descent and hike to the first camp on the Canadian side (Happy Camp) takes another 4 hours. The first part of the descent requires walking on snow in several sections, though, hiking poles are sufficient to maintain balance and not slide down the patches of snow. Once down, the rest of the way requires several creek crossings (some higher than ankle height with no option but to walk through). Having Gore-Tex boots and gaiters was quite helpful and I was happy to find my feet weren’t swimming in water by the time we reached camp.
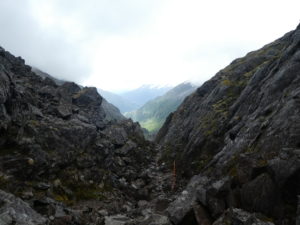
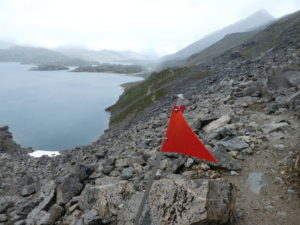
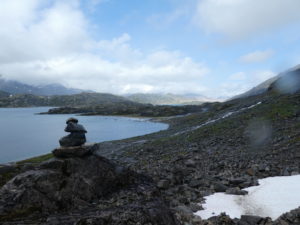
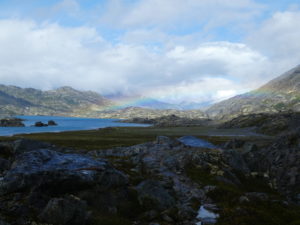
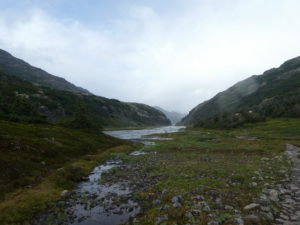
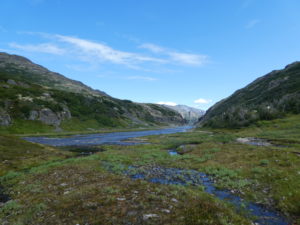
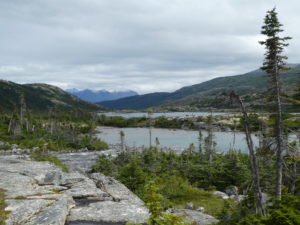
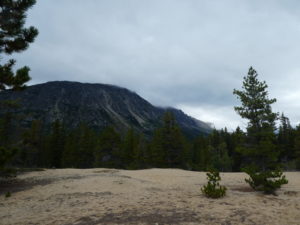
 The view descending from the pass was spectacular, and despite our still somewhat frozen fingers and the on again off again rain, we made several stops to take some pictures because the scenery was simply too beautiful to just walk by without documenting.
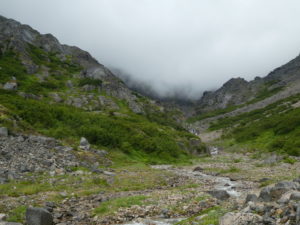
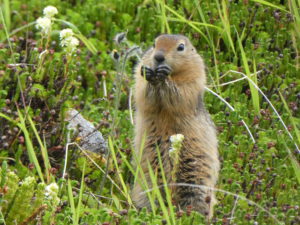
By the time we were a couple kilometers out from Happy Camp, our feet and shoulders were crying out in pain, and it was just “one foot in front of the other” and periodically shifting our packs to try to try to change the pressure points on our shoulders. When we finally saw what looked like the first few tents set up at Happy Camp, we couldn’t have been happier. Nevertheless, I paused to take a couple more shots of the beautiful valley in front of me, and a friendly little ground squirrel happily chewing away on some treat he had found.
 By the end of the day, although the linear distance on the trail map read about 12km, my InReach GPS insisted we had hiked about 16km. I suspect this was due in part to the zigzagging around boulders on the ascent. Like Sheep Camp, Happy Camp’s tent pads were made of wooden planks and elevated above the ground, helping to keep the tent dry.
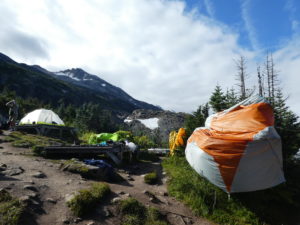 That said, the rain clouds began to dissipate and when we woke up in the morning, the sun was out. One of the fellow hikers was right, when earlier on day 3 he insisted that the sun always comes out at Happy Camp. While definitely the toughest, the day of the Chilkoot Pass was also the most picturesque and memorable day of the trail.
Day 4:
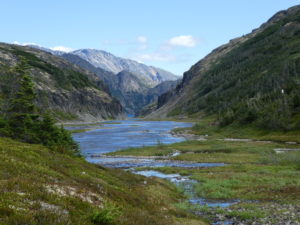
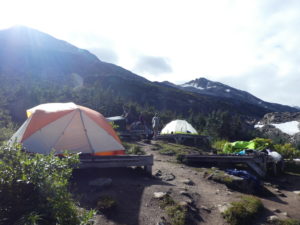 We woke up to the sun shining down on Happy Camp, and knowing that our distance to cover was significantly less than the day before, we allowed ourselves to sleep in and take our time in the morning. We also decided to leave the tent up until we were ready to leave, to just to let the fly dry out. Most other hikers did the same, hanging up wet tent parts and clothes on trees until they were ready to head out. After a leisurely breakfast, as our tent dried out, we went for a little walk up the way we came the previous day to take some photos of the valley in the sun.
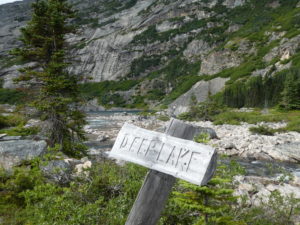
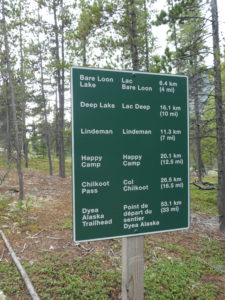
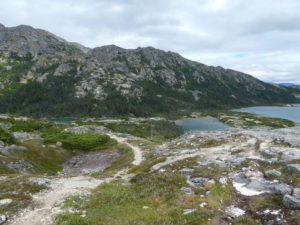 When we finally left camp, it was around 11 or 11:30am. The hike to our next camp, Bare Loon Lake, was about 14km long. There was a couple of uphill sections, but the majority of the day was a gradual descent on nice paths. Despite the day being fairly long, it was not hard (especially compared to the day before) and the views and stops along the way made it quite pleasant. Between Happy Camp and Bare Loon Lake there are two other camps, which we stopped at for breaks. The first of these is Deep Lake (4 km from Happy Camp), where we joined other hikers for lunch and rested for about 30 – 45 minutes.
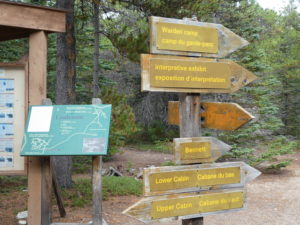
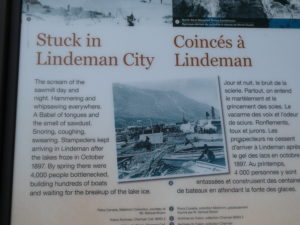
 From there we carried on to Lindeman City. Several hikers with whom we had gone over the pass chose to stay there for their last night, but we had booked Bare Loon Lake, based on recommendations we read on the Chilkoot and Yukon River facebook group. We did stop at Lindeman City for a snack (it was about 4:30pm when we got there) and to walk through the small interpretative center tent. Aside from a lesson on history, you could also get a certificate of completion for the Chilkoot Trail.
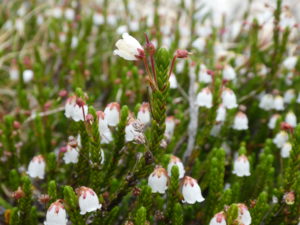
 From there we carried on to Bare Loon Lake, only stopping quickly to see an old cemetery from the age of the Gold Rush. Actually, I should mention that I also stopped frequently to pick (and eat) yummy wild blueberries. The park ranger who gives the safety briefing at Sheep Camp has pictures of the good and bad plants – so if you’re comfortable with your recognition skills, the wild blueberries are worth a try!
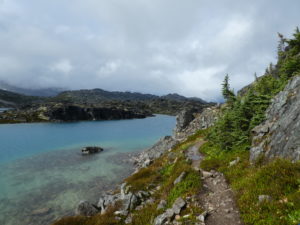
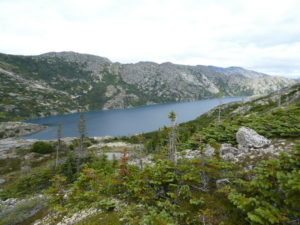
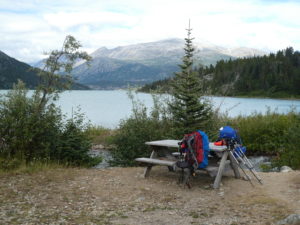
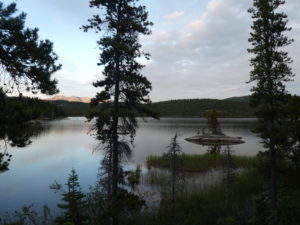
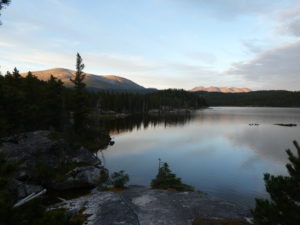
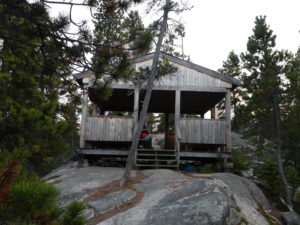
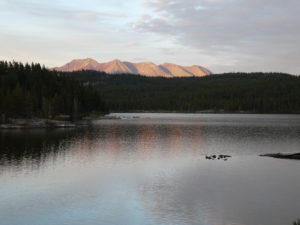
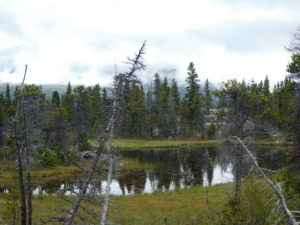
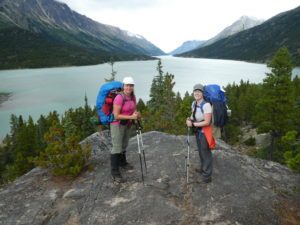
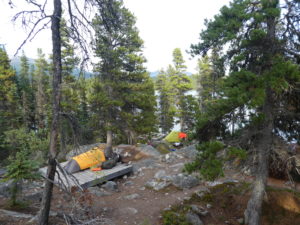 We reached the camp at about 7 pm. We were one of the last sets of hikers to get there, but this was our usual state due to our late morning departures. We set up a tent on a nice wooden tent pad and enjoyed supper in the little shelter with fellow hikers. Despite the longer distance, staying at Bare Loon was definitely the way to go. Not only is the prettiest of the camps, situated right next to a lovely lake, and with a good set up of tent pads, it is also the closest camp to Bennett Lake and the end of the trail. As we had to catch a train the next day, it was nice knowing we could have another fairly lazy morning and still make it to Bennett Lake with plenty of time to spare.
Day 5:
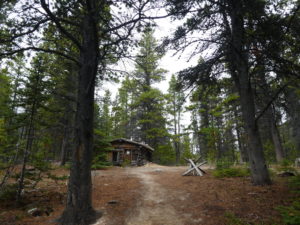
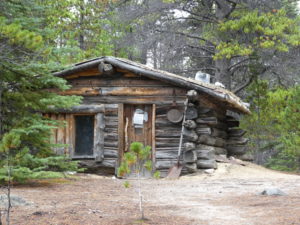
We woke up on day 5 to rain (it had started to rain sometime in the middle of the night). However, as we were heading out, it didn’t matter. We packed up our tent, enjoyed a leisurely breakfast, and set off around 9:30am. The hike to Bennett Lake from Bare Loon was about 7km long, and while it didn’t take all that long (we were there by around noon), it seemed to drag on forever, especially near the end. What on the map appeared to be downhill did not feel like downhill at all, and in fact it felt like there was more up and than down. We did, however, see a neat little trapper’s cabin on the way.
 By the time my GPS showed that were at Bennett Lake, we were ready to be there, and yet, the path seemed to go and on. I’m sure part of this was psychological – the last day when you’re almost there always seems to be the longest. This was another reason why having stayed at Bare Loon had been a good choice. The folks who stayed at Lindeman City had an extra 5km to hike out that morning (and in the rain no less).
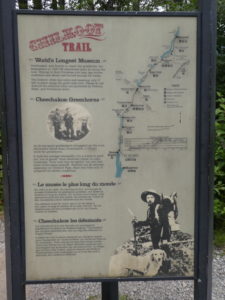
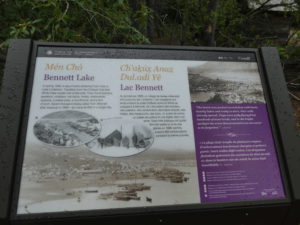
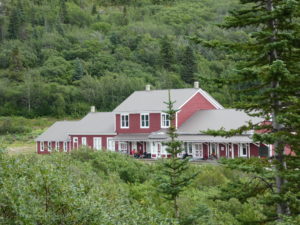
When we finally reached Bennett Lake, we took several pictures at the view point and of the old church on the hill before descending down the stairs towards the train station. We stopped to read some more signs, which explained about the history of Bennett Lake and Chilkoot Pass, and headed to the train station to warm up and have some lunch.
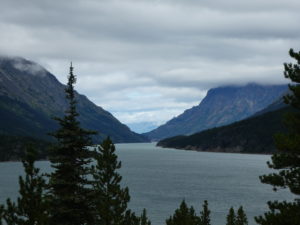

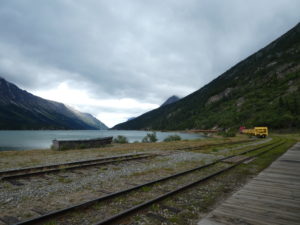
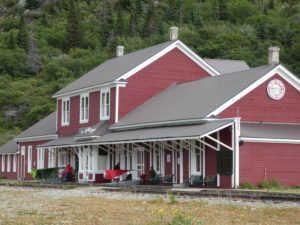
 Note, that Bennett Lake is also a camp, so it is possible to stay here for one night before catching the train. The train station is unmanned, but has clean washroom and the inside is bit of a museum/interpretative center with a TV playing a video of the history of the Chilkoot to entertain hikers waiting for the train. As we had about 3 hours to wait before the train arrived, we took the time to dry out the tent fly, and walk around the Bennett Lake area, taking in the beautiful scenery and taking many photos.
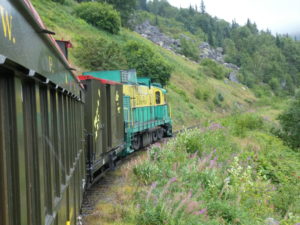
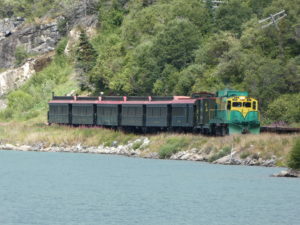 When the train finally pulled up, the conductor instructed us where to put our packs (special storage car) and directed us to our car (at the back of the train, to shelter the rest of the tourist from the hikers’ smell no doubt). We had prepaid for a lunch, which we thought might be something warm. It turned out to be a cold sandwich and a bag of chips (NOT worth the 20USD it cost). Recommendation: don’t pay for lunch, just have some extra food with you to eat on the train. Hikers who had done the trail many times said that a number of years ago the train station would serve hot soup to the incoming hikers, but this is no longer the case.
 Besides that, the train was comfortable, and the ride back down to Skagway was incredibly interesting and picturesque (though it would have been more so if not for the fog that descended on the whole valley). The train stops twice – once for US border security to ask if everyone has a passport, and once in Fraser for Canadian border security to walk around and take a quick look at everyone’s passport.
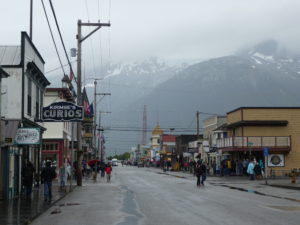
We arrived in Skagway tired, but with a sense of accomplishment. Happy that our car was waiting for us right in town and that we didn’t have to retrieve it, we headed over to Westmark Inn. After warm showers and relaxing for a bit, we walked to the Skagway Brewing Company for a much coveted (and deserved) beer and warm meal. The food was great, as was the beer, and I definitely recommend stopping in for a pint. The next morning we packed our bags, and after another great breakfast at Glacial Smoothies and Espresso, we said goodbye to Skagway and headed for Whitehorse. (For more about Whitehorse and the Alaska Highway drive, please stay tuned for my next post).

What to bring (and not to bring) on the Chilkoot Trail:
Keep in mind that you will have your pack on your back for the number of days you are planning on taking to do the hike (for most people 4 nights, 5 days).
For hiking the Chilkoot trail for 4 nights (5 days), in August, here is my recommendation:
Clothes:
- A pair of socks per day, plus an extra pair. Hiking in wet socks sucks. With the variable weather and the rain, you may not get a chance to dry wet socks. Also, day 3 involves walking through several creeks (which are quite high if it rains), and there is no choice but to walk through.
- 2-3 hiking shirts – so you can change shirts every couple days (you can wash one and dry on your pack while you hike – if it’s not raining).
- Rain jacket (I had a thin Gore-Tex shell which was sufficient)
- I normally wear a pair of pants that has zip off pant legs and I will wear the same pair for the whole week trip. I would recommend an extra pair of shorts as well as long underwear (pants and shirt) to wear in the evening/to sleep in. My friend also brought rain pants (which was a good idea) though I got by with gaiters. My pants were quick dry so combine with gaiters they were just fine (I also find I get hot in rain pants).
- Light fleece/ merino wool sweater as evenings on the coast can get chilly (I had both and in the evenings would wear them under my shell)
- Sandals to wear in the evening – I recommend Keens as they are good for wading in the water, they protect your toes, you can wear socks in them, so multi-purpose and functional
- Sun glasses
- Sun hat
- Beanie (small thin wool tuque, called skull cap by some)
- Gloves (two pairs – best if one is neoprene)
- Rain pants/gaiters
Additional Items
- Camp suds – A biodegradable liquid soap that can be found at outdoor stores like MEC or REI
- Headlamp – I don’t go hiking without one. Useful for the tent, trips to the outhouse at night, and hiking if you get stuck out after sunset
- Small stove – I use the Whisperlite international and it works great. I’ve never had any issues with it and always take it on the big camping and hiking trips. I like the fact that the fuel bottles are refillable so more environmentally friendly than the Jetboil stove. That said, most other people on the trail had a Jetboil or a propane canister stove, which is much quicker to set up and does not require pumping)
- Hydration pack – it’s nice to sip water as you go without having to stop to take out your water bottle
- Additional water bottle
- Water treatment – There are many to choose from. For the Chilkoot Trail, just about anything works. We primarily used the gravity filter as it’s easy to scoop up water and then hang it from a tree (you don’t have to pump). The gravity filter is also great for filtering a large amount of water so easier for groups and it means you don’t have to keep running back to the creek. I always also carry a pack of pills as backup (but you have to wait about 30 mins after adding the pill). My friend sometimes carries a UV filter that screws onto her Nalgene bottle, which is good for getting up to 1 liter of water at a time, quickly – though we did not have this on the Chilkoot Trail due to trying to not bring unnecessary weight.
- Knife/Multi-tool (Gerber or Swiss Army Knife)
- A couple of packs of waterproof matches in Ziploc bags (kept in different spots just in case one gets wet or lost). I usually keep one pack with the stove and another pack in my pot.
- Contact solution if you wear contacts and your glasses (in case you lose a contact)
- Light weight travel towel
- Cooking pot (individual or bigger depending on your group preference) – I like my 1L aluminum pot
- Kobo or Kindle for your reading pleasure in the evenings (or a game of cards if you so choose)
Food suggestions
Breakfast:
- Starbucks Via packets (the lightest coffee I have found)
- Dehydrated milk
- Instant oatmeal (2 packets per meal)
- Granola/dehydrated milk/dehydrated berries
- Individual peanut butter/almond butter/honey packs and melba toast * (if you bring melba toast I would put in in your cup or pot so it doesn’t get crushed)
- Dried cranberries/nuts
Lunch:
- Pita bread/rolls/bagels or crackers/melba toast
- Individually wrapped cheese (Balderson, Babybel) ** they keep really well for several days!
- Tuna or salmon packets (not cans)
- Peanut butter packets
Supper:
- Dehydrated food packages from MEC/REI (Mountain House brand tastes pretty good and is good for two people. Mary Jane’s Farm is healthier (and organic) and comes in portions good for one person – Curried Lentil Bisque is my favourite.)
- Knorr vegetable soup (as a side)
- Your own dehydrated meals
- Could bring a packet of hot dogs for the first night
Snacks/other
- Pepperoni sticks
- Beef jerky/bacon jerky
- Nuts/dried fruits (be careful because these can be quite heavy)
- Lara bars/granola bars/fruit bars (whatever you prefer)
- A little bit of chocolate for each day
- Hot chocolate packets
- Tea
*I like to bring two bars a day plus a couple extra bars – but not too many extra as they do add quite a bit of weight. Same goes for hot chocolate packets – they are heavy, so don’t bring more than what you think you’ll actually drink.
Great job Anna…even tho I know I will never be able to do this I feel like I have a great taste of your experiences…would love to spend a weekend camping with you guys sometime…a little tamer than this perhaps as it has been about 35 years since i went camping…LOL…picture are great.
Enjoyed reading your blog Anna! This is hike is on my bucket list. Great information and nice pics. Did you happen to come across any place to do laundry in Skagway?
Hi Linda! Thanks for your comment! While we did not do laundry, Mountain View RV Park did have a laundromat (though I cannot comment on its quality as I didn’t go inside). As well, Westmark Hotel, where we stayed, also has self-service laundry. According to google, Garden City RV Park also has laundry facilities. I did not notice any actual laundromats as we wandered around town though.